Browsing Category

tutorial

How to make a maypole

may pole

My husband is very used to hearing me say ‘I have an idea’. It may elicit a groan, but not always. And it doesn’t always mean I am asking for his help, but sometimes it does *wink*

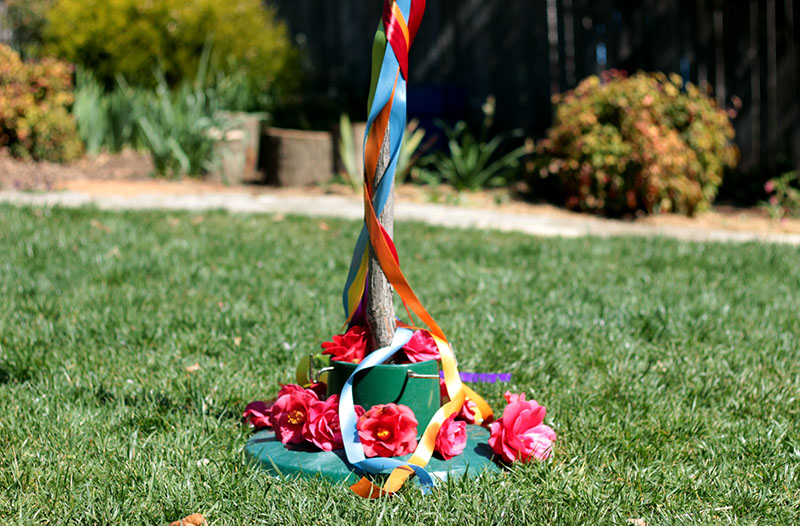
My most recent idea was making a maypole for my Waldorf playgroup. Something on a smaller scale than the beautiful maypole at our Waldorf Spring Fair. And something easy to set up and pull down. And then it came to me ~ why not use a Christmas tree stand!

maypole base

maypole stand

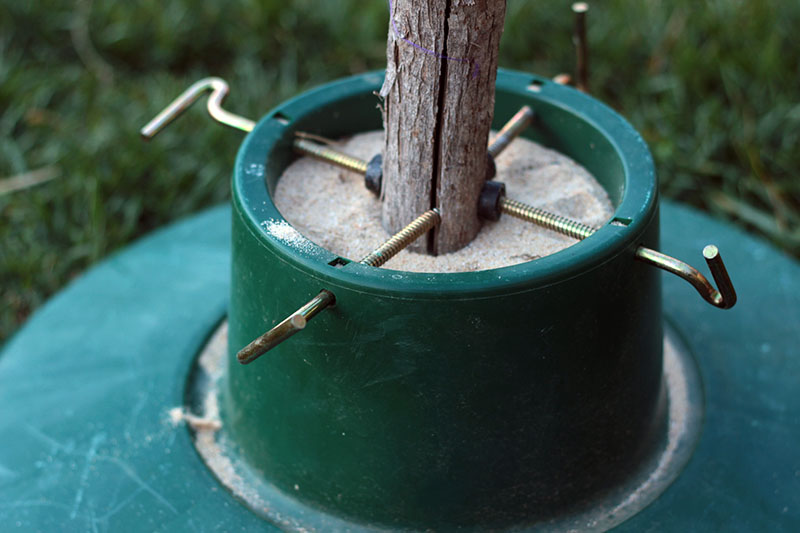
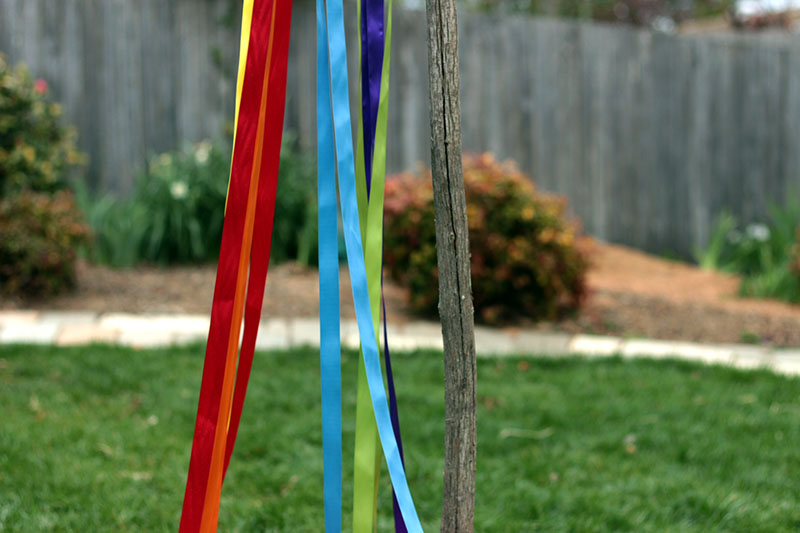
We used a long branch (that we had in the garden for loose parts play) as our pole. My husband drilled a hole at the top of the branch and screwed in an eye screw. Then I placed the pole in the Christmas tree stand, tightening it up to hold the pole in place. I also added some sand to help stabilise it.

Next was the wonderfully colourful step of adding ribbon! I used 6 colours that were 3 meters in length. I folded them in half and used a slip knot to tie them to the eye screw.

ribbons

eye screw

And then we just needed to pop it in place on the day, using tent pegs to hold the stand steady.eye screw for maypole  maypole ribbon and branch

Next week I will share photos from our Spring maypole celebration *grin*

And if you would like to see how to make a permanent or stronger maypole visit my friend Gae at Cherished Hearts at Home.

Happy days, Kelly

Painting rainbow Easter eggs

Easter eggs5

There is no such thing as too many rainbows. They make us smile. They are whimsical, beautiful and fun to create. They can transform a peg doll or a wooden egg!

To make our wooden rainbow Easter eggs I used:

Starting in the middle of the egg I painted a green ring. Not worrying about having clean lines so later the colours would overlap and run, giving the eggs a beautiful organic feel.

Easter eggs1Easter eggs

Next I painted red at the top and violet at the bottom. Only allowing the colours to dry slightly before adding the colours between, letting them overlap and mingle. Creating a gentle and beautiful rainbow.Easter eggs2Easter eggs3

Once the paint dried I used my hands to rub the eggs with homemade olive oil and beeswax polish. The polish protects the wood, but also deepens the colours. Leaving a vibrant colour with a gloss finish (the photograph above shows one egg with the polish and one without). Working with the polish is lovely, it has a warming beeswax scent and is gentle on the hands.

Easter eggs4Easter egg

Our beautiful rainbow Easter eggs now sit along our window sill helping us build towards our Easter celebrations.

Happy crafting, Kelly